Replacing the Headliner
ONE BIG PROJECT!
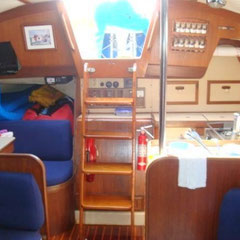
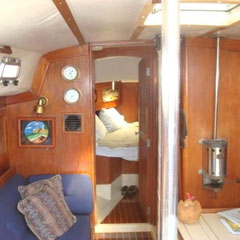
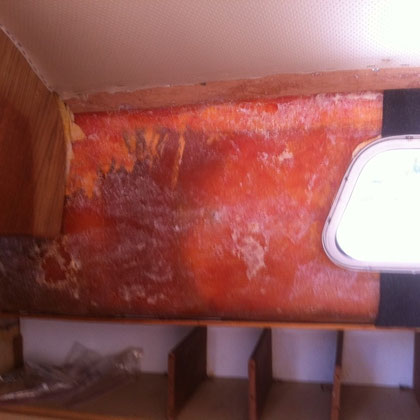
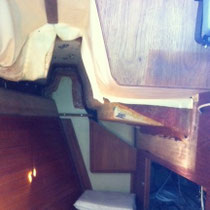
Pictures Before Completely Stripping Out the Vinyl...


The Cal sailboats of this era are notorious for sagging Side Vinyl Coverings, as well as Main Salon Headliners. Generally, the foam insulation has turned to powder... and it is a mess!
Following below, you will find some of the pictures we have of our very intense, and time consuming replacement, and upgrade of the Headliner, and Side Upholstery in this Cal 35. We have many more pictures at PhotoBucket online - just go to the Link below to see them...
Use this Link to access even more pictures:
http://s1058.photobucket.com/albums/t416/rickusc/
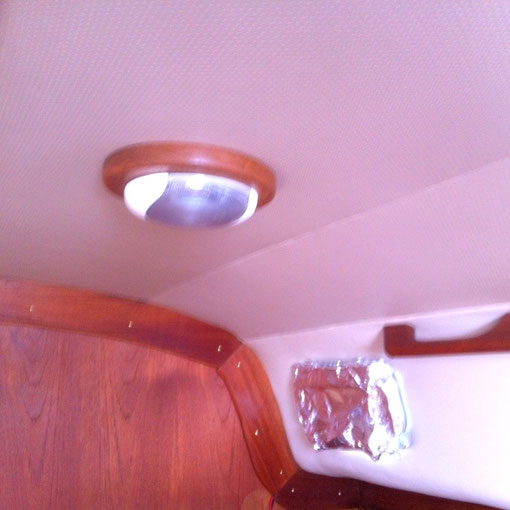
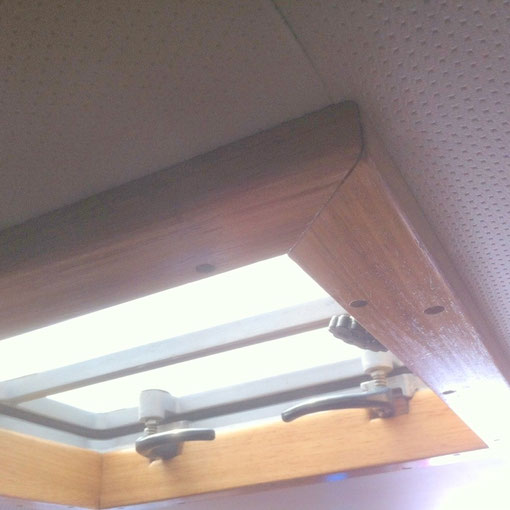
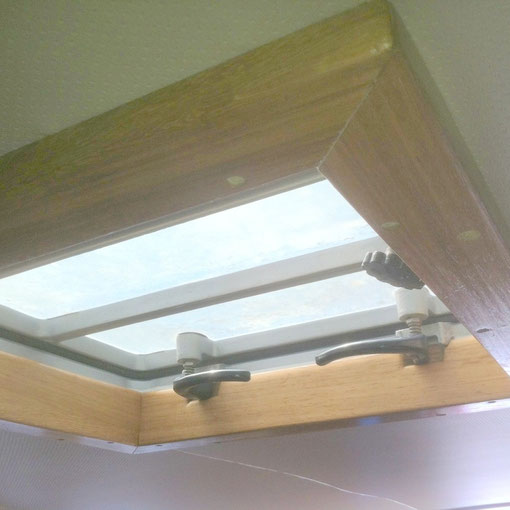
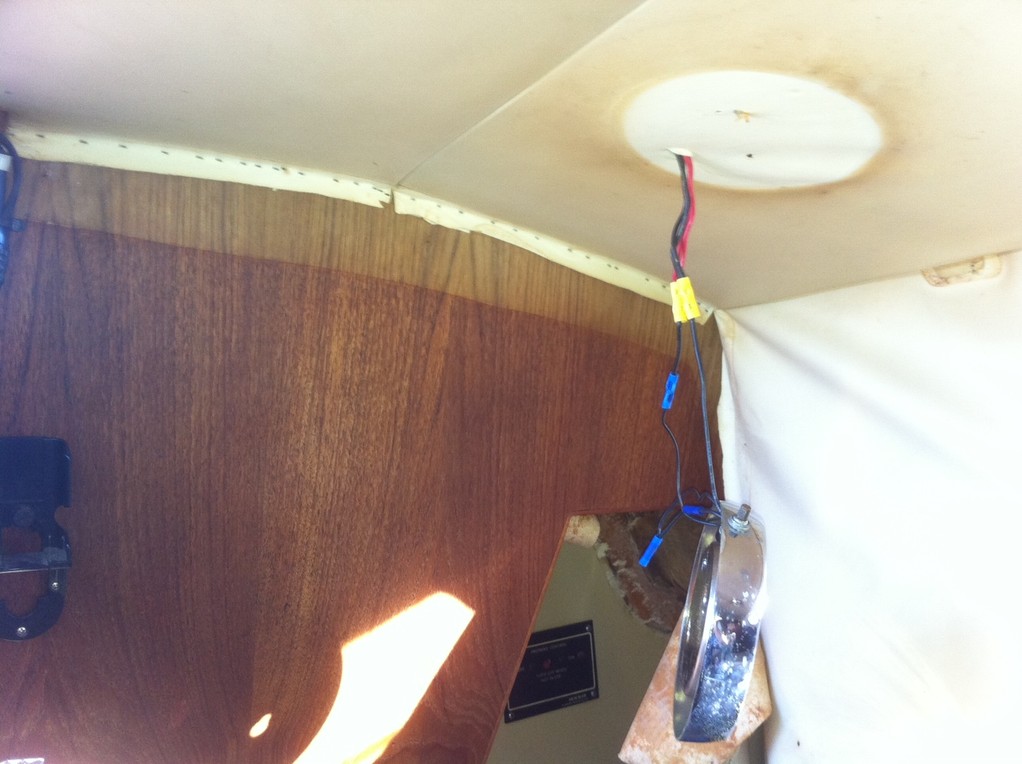
The Second Wind, prior to purchase... note the sagging on picture 2, forward of the porthole. You can also see the light tan vinyl panel above the quarter berth - which I removed for the redo, opening up more space...

S/V Second Wind prior to replacing Headliner & Side Upholstery...
Check it out! EVERY Cal sailboat of this era, that I've seen listed on line, has a terrible ugly eyesore from this - and I don't see anyone tackling this problem!
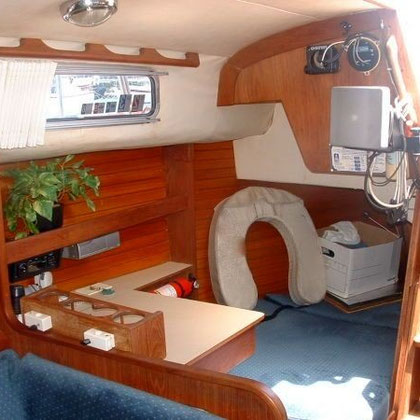
Other Cal 35s... Note the sagging side upholstery on all... And, note the headliner on the one - with strips of wood to hold in place... ugh!
Other Cal 35s... They all have the same issue...
We ended up replacing, not only the sagging side upholstery, but the headliner as well. We also modified the Quarter Berth, taking out unnecessary panels, which restricted space.
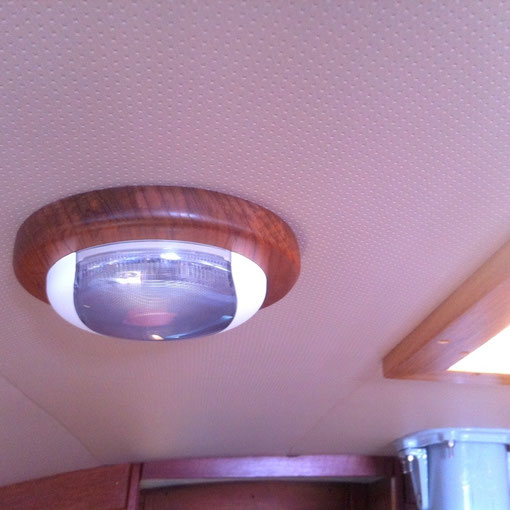
Additionally, we installed all new LED lighting - four Dome style Hella Marine EuroLED Touch fixtures in the main salon, two Sailors' Solutions SensiBulb dimmable recessed LED lights in the quarter berth ceiling, one of the same under the entry hatch - over the Electrical Panel, and two more of the same - to port of that - lighting up the aft Galley area.
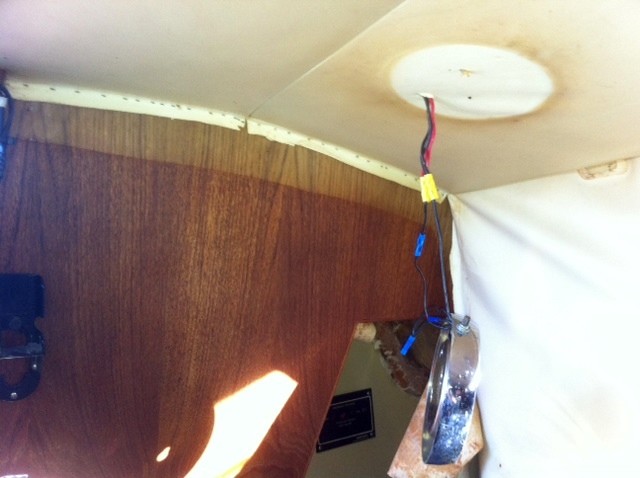
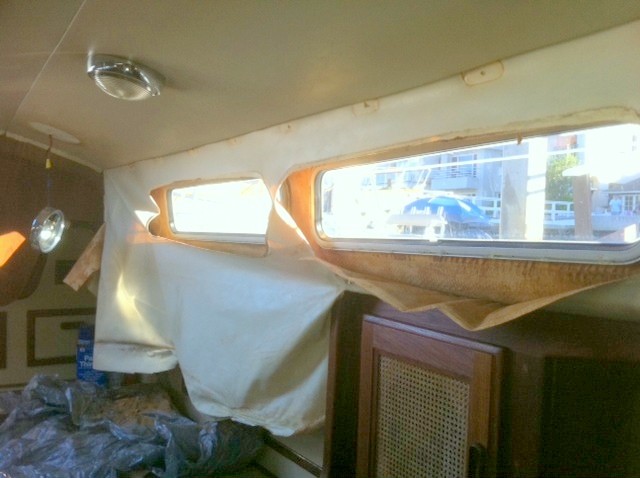
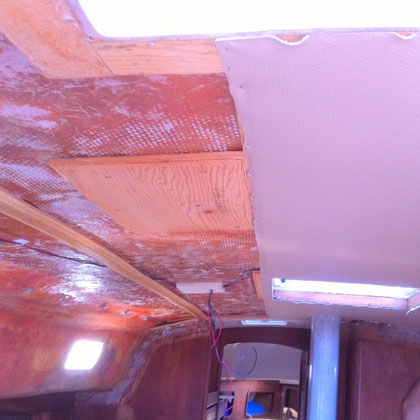
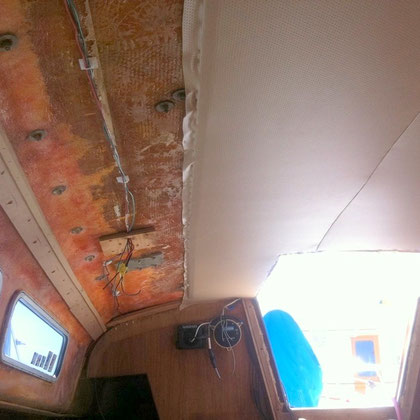
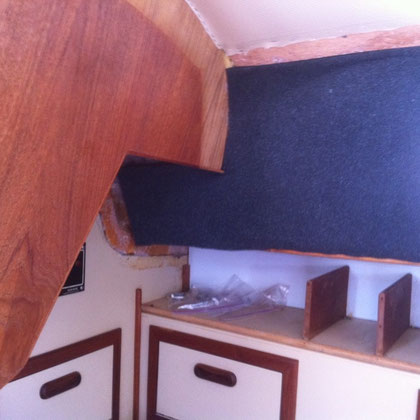
PICTURES AFTER HEADLINER & SIDE UPHOLSTERY REMOVED

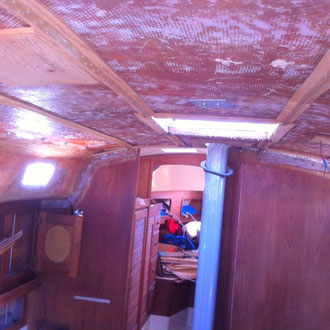
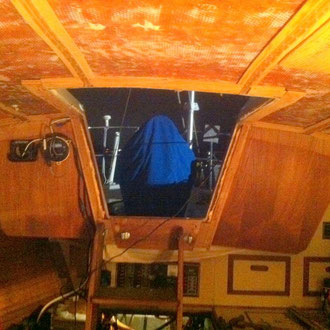
After stripping out all the vinyl - both the side upholstery and the headliner - we vacuumed and cleared away all the remaining foam and foam dust, and cleaned all the surfaces.
VIDEO AFTER STRIPPING OUT VINYL...

We could not use the original headliner seam system, which had the vinyl roll around a "U" shaped plastic strip (they were not to be found anywhere - and our vinyl for the headliner was too thick), which snapped onto another receiving plastic strip, and over the other panel of vinyl to make a smooth, thin seam (see video).
We then devised a new system to install the headliner in the ceiling. Instead of using the usual upholsterer's cardboard strips for tacking in the headliner, we made the same size strips out of plastic (so there would not be any degradation from moisture from the marine environment).
VIDEO OF HEADLINER SEAMS SYSTEM...
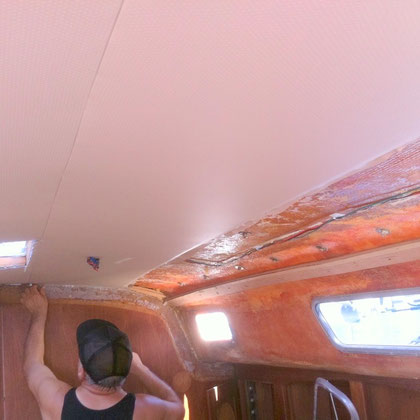
We started with the center panel in the main salon. First we stapled a plastic strip where the port seam would be (running aft foreward), and we stapled the vinyl headliner material over the outside edge of it, to be able to butt-up the next port panel to it, and making a tight seam.
Two of us worked this - holding and stapling tight to the plastic strip. After completing the port side of the panel, we did the starboard side, pulling it tightly over the plastic strip. When finished, we had the center panel installed, ready to expand outwardly from it, to starboard and then to port.
GETTING THE HEADLINER INSTALL STARTED...


As we added a panel on the starboard side, we inverted the vinyl, stapling the plastic strip, onto the upside down end of the vinyl, along the seam line. The two of us worked, one holding and pushing the vinyl wrapped plastic strip up tight to the other panel's vinyl covered plastic strip, while the other stapled.
After we had a complete, tightly butted-up, second panel of vinyl, we stretched it back over itself (rightside up now) and
stapled the end of it farther starboard, over another plastic strip, like we did on both sides of the center panel, to set up the next seam.
ADDING TO THE CENTER PANEL OUTWARD...
And we continued, completing two more panels to starboard of the center panel; and two more panels to port of the center starter panel. At the end of each second panel on either side, when we got to the line where the headliner and the side upholstery met, we stapled the ends beyond it (to be covered by the side upholstery), without a plastic strip, flatly to the wood tacking strip.
After finishing the headliner to the original separation lines, we began our next step.
CONTINUING TO THE HEADLINER'S EDGES...
We then glued foam to the side walls of the cabin (around the window areas) to cover the uneven surfaces of the side fiberglass walls (see photos). After all surfaces were smoothed out evenly with foam, we began to install the side vinyl upholstery.
Using a plastic strip, we inverted the non-perforated and lighter tan colored smooth vinyl material for the sides, at the line where the headliner and side upholstery met, and stapled the plastic strip - through the plastic strip - through the vinyl - through the headliner overhang - and into the wood tacking strip on the fiberglass wall.
After completing the seam, from aft to foreward on the starboard side, we had a drape of vinyl hanging down from the seam line. While stretching the vinyl down from that strip and the seam, we tacked the end of the vinyl to the extreme bottom of the run. We then did the same on the port side.
We finished off the ends, by covering them with finished mahogany wood trim pieces.
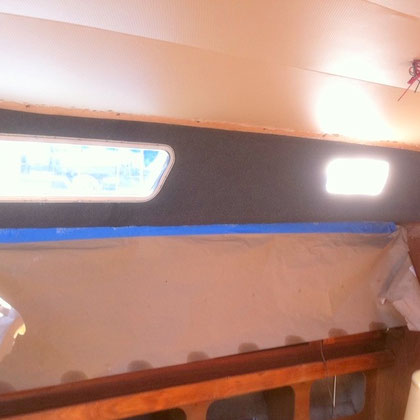
FINISHED HEADLINER - NOW FOR THE FOAM!
HEADLINER FINISHED! FOAM FINISHED!
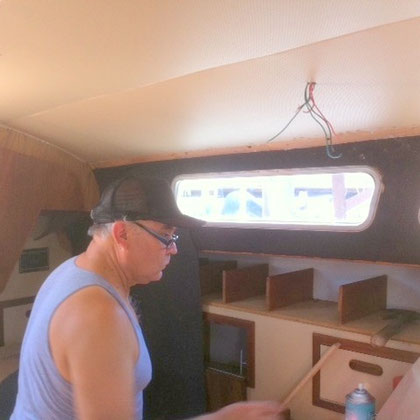
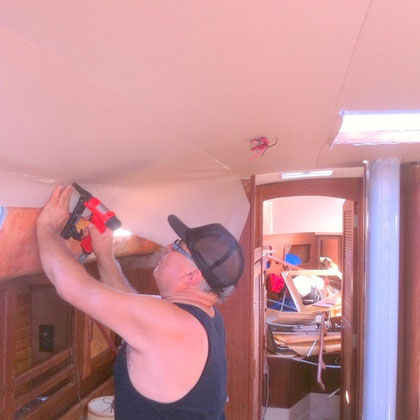
We then prepared to in stall our new Hella EuroTOUCH LED Dome Lights, with "Momentary Switch". We made Teak Circles to mount them to the ceiling of the Main Salon, which not only looked impressive, but gave us room for connecting the new units to existing wiring with butt connectors. (see our info on the "LED Interior Lighting" Tab)
AND THEN THE QUARTER BERTH...
After finishing off the main cabin headliner and side wall upholstery, we turned our attention to the quarter berth...
We had to do some creative wood work to fit in the vinyl side wall upholstery for the quarter berth... and it is hard to explain.
We did a combination of vinyl stretched over a different type of foam in the quarter berth area (a dense, thin foam) where it was a vertical run - up and down - from the ceiling down - running parallel to the sides of the boat. And, we used 1/4 inch marine pylwood sections with vinyl, wrapped and glued to them, for surfaces that ran perpendicular to the sides.
Suffice it to say, we had to have a surface to allow us the stretch the vinyl from the ceiling edge to the end of the run
at the finished wood interior, in a smooth manner, and we used vinyl wrapped panels to finish off the walls parallel with bulkheads.
We also formed new ceiling panels, wrapping them in the new Headliner material, and installed new LED dimmable lighting, for the Quarter Berth ceiling, and under the Main Salon entry hatch & Galley areas.
After we had all surfaces for gluing in vinyl, and all ceiling and wall panels ready and wrapped, we glued in the foam, and got ready to install the vinyl.
We tacked in the vinyl at the ceiling on wood strips which we epoxied in, leaving an area to screw in the new upholstered ceilings. We used finished mahogany wood trim to finish off the ends, and cover the vinyl tacked in at the end of the run - at the bottom.
We installed two recessed LED lights (from sailorssolutions.com) in the ceiling of the Quarter Berth, one more under the entry way steps, over the Electrical Panel there (where we had made panels like the quarter berth ceiling), and two more to the Port of that, under the overhang, lighting up the aft Galley.
We made the panels, both for the ceilings, cut to fit, with dimmable recessed Sailorssolutions.com Sensibulb LED Lights... Find them here...
http://www.sailorssolutions.com/index.asp?page=ProductDetails&Item=SBRS01
http://www.sailorssolutions.com/index.asp?page=ProductDetails&Item=BankDim01
Sailors Solutions Sensibulbs... Excellent Warm Light... Low Draw...
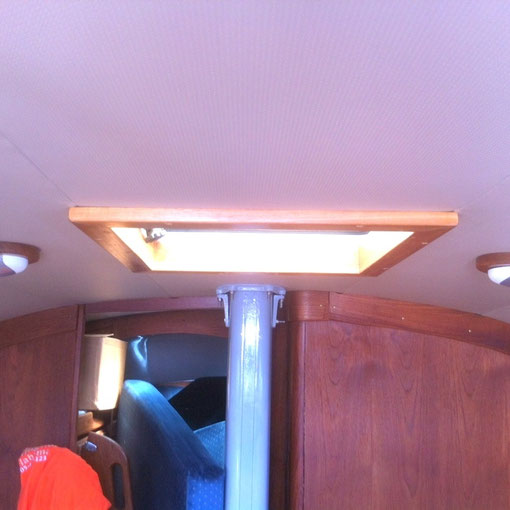
New Headliner & Upholstery, Teak Hatch, & LEDs